Easy Lemon Yogurt Cake

As soon as there is the tiniest hint of Spring in the air, all I want is lemon.

Lemon with shrimp, lemon with pasta, and especially lemon desserts.

I guess after a winter of heavy and rich soups and stews, my taste buds are craving something as bright and zingy as the beautiful sunshine streaming through the windows.

This is a fantastically light and fluffy cake. And the best part? I almost always have all of the ingredients on hand.

For this recipe you will need:

  • 1 ½ Cups  Flour
  • ½ Cup Greek yogurt
  • ½ Cup Canola Oil
  • 1 Cup Sugar
  • 2  Eggs
  • 2 Tsp Baking Powder
  • ½ Tsp Salt
  • Lemon zest (as much or as little as you want)
  • ¼ Cup Lemon juice (about 2 lemons)

Preheat the oven to 350 and grease an 8 inch round cake pan.

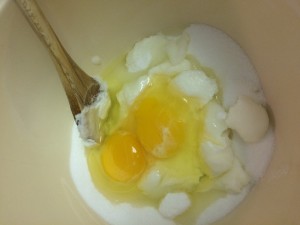
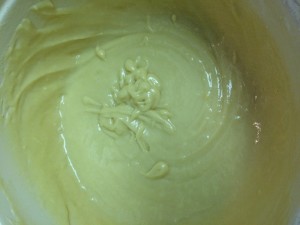
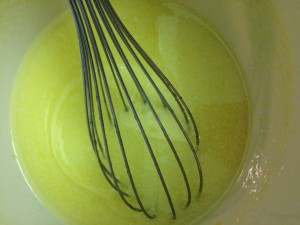
In a large bowl, which yogurt, sugar and eggs.

IMG_4221

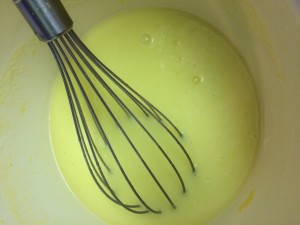
until you have a well combined batter

IMG_4222

Add lemon juice, oil and lemon zest

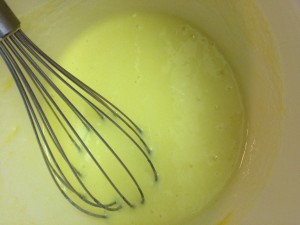
It’s going to look like it wants to separate

IMG_4223

but keep whisking until well combined

IMG_4224

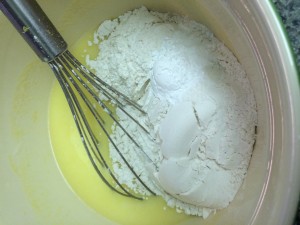
Add flour, salt and baking powder to the wet ingredients

IMG_4225

And whisk (carefully so you don’t have flour all over your kitchen) until you have a smooth batter.

IMG_4226

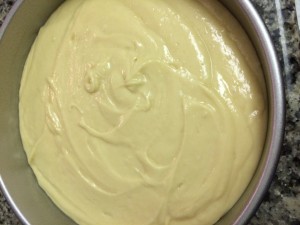
Pour into your greased cake pan.


IMG_4227

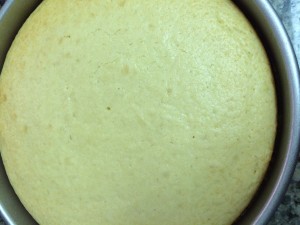
And bake for about 30 minutes. Until a toothpick comes out clean.


IMG_4228

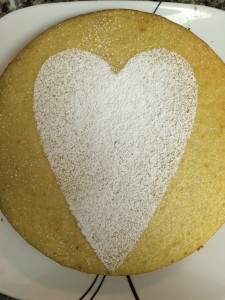
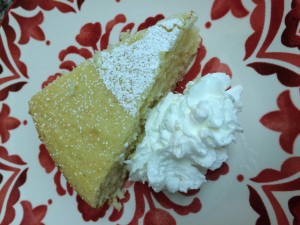
After the cake cools, remove from cake pan and dust with powdered sugar. If you want to get fancy, you can cut a shape out of parchment paper and use it as a template for the powdered sugar.

Aww

IMG_4233

Slice and serve with some whipped cream.

IMG_4234

Lemony, light and oh so delicious.

And kind of healthy!

No butter and not a lot of sugar. Plus Greek yogurt. Which is so good for you.

Win!

Lemon Chess Pie

Bright Sunshiney days make me think one thing: beach.

But, since we can’t get to the beach yet, sunshine’s got me thinking about bright bursts of citrusy flavor.

In the form of a lemon chess pie.

Chess pies are super Southern and consist of eggs, butter, sugar and vanilla. It’s a great recipe to know because you usually have the ingredients on hand and can whip this up if guests unexpectedly will be arriving soon.

This recipe comes from Southern Living. Instead of using vanilla, I used some lemon juice to give the pie a more summery twist.

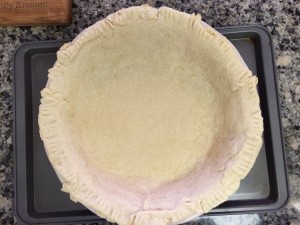
Start with a pie crust. You can use store bought or homemade.

This little beauty was made by my husband. Following my grandmother’s recipe.

I love that. Him reading the recipe written in her handwriting.

IMG_0673

So, once you have your pie crust baked and cooled, it’s time for the filling.

You will need:

  • 4 eggs, separated
  • 1/4 cup butter, melted
  • 3/4 cup sugar
  • 1/2 cup lemon juice

Preheat the oven to 350.

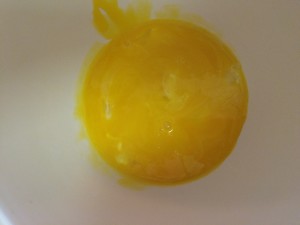
Separate the eggs, placing the yolks in a big bowl

IMG_0675

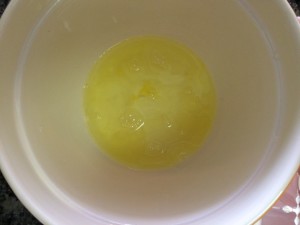
And the whites in a not as big bowl

IMG_0674

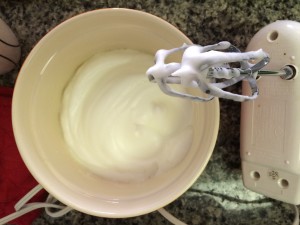
Using an electric hand mixer, beat the whites into stiff peaks. See how there’s a little point of egg white standing up on the mixer? That’s a stiff peak.


IMG_0676

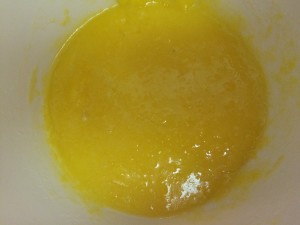
Leave those whites for a minute and turn to the yolks. Add the melted butter, sugar and lemon juice and stir.

IMG_0678

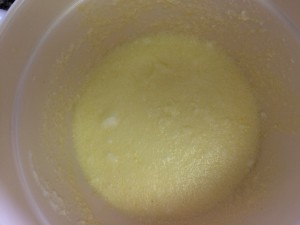
Now, gently tip the whites into the yolk mixture and fold them in.


IMG_0680

You’ll get this beautiful, pale, buttery yellow.


IMG_0681

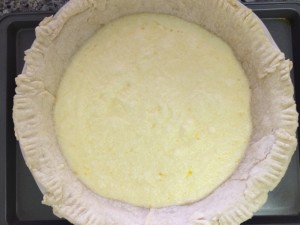
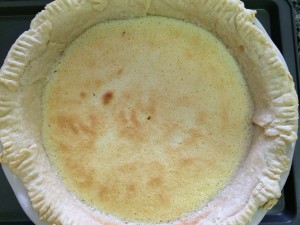
When fully combined, pour the mix into the crust.


IMG_0682

Bake at 350 for about 30 minutes, until set.


IMG_0683

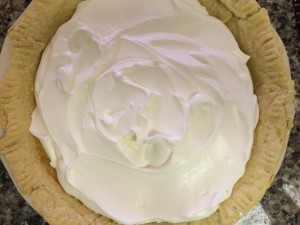
Let cool in the fridge, and then pile high with whipped cream.

IMG_0684

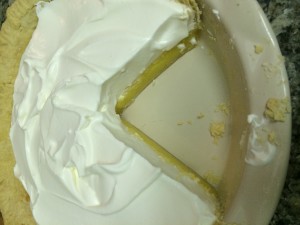
When you slice it, I love the contrast of the lemony yellow against the glistening white whipped cream.

IMG_0687

Served icy cold, this pie is like a glass of lemonade on a hot summer day: refreshing, tart and sweet and so satisfying.

Garlic Lime Rice and Old Bay Shrimp

After an incredibly brutal winter filled with sub zero temps and lots of snow, New Yorkers were so ready for the 70 degree day we were graced with over the weekend.

Rooftops were crowded, tables were dragged out onto the small sidewalk spaces in front of restaurants and, yes, ice cream trucks abounded!

The first warm day is my favorite day in New York. Not just because the sun feels glorious after a long winter of my face being buffetted by wind (why is the West Side so much windier than the East, by the way?) but because of the beauty of watching the city emerge from its chrysalis.

Al fresco dining. Rooftop cocktails. Breezy dresses. And finally, lighter cuisine.

I love the comforting pots of soups and chilis in the winter, but I crave the bright, fresh flavors of spring.

This dish begs to be made on a sunny day when margaritas are the only logical choice of drink.

This recipe is great for those warmer days too as there is little time at the stove and few ingredients needed, so if, you know, some friends find out you have a rooftop and happen to be in the neighborhood, you can feed them. If you want to.

I made this for my husband and I but wound up with leftover rice for lunches for the week, which was my intent. So feel free to half the rice recipe if you don’t want leftovers (but I don’t know what kind of person you would be if you didn’t want leftovers. Sorry no judging in this house)

For the rice:

  • 2 cups rice (I used arborio because that’s what I had, but you could use white or brown or whatever)
  • 1 red onion, diced
  • 2 cloves of garlic, minced
  • juice of 2  llimes
  • 4 cups water
  • olive oil

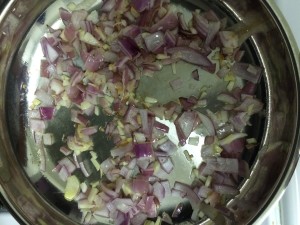
Drizzle some olive oil in a high-sided skillet and toss in your onions and garlic. Cook for about 5 minutes or so on medium heat, stirring so garlic does not burn.


IMG_0665

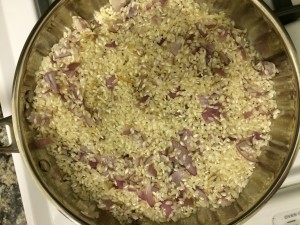
Add your rice and let it cook for 2-3 minutes. It will toast a bit and pick up some of the onion and garlic flavors.

IMG_0666

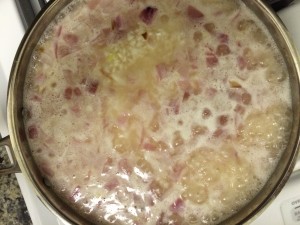
Season with salt and pepper. Add the water and the lime juice. And bring to a boil. Once boiling, lower to a simmer, cover and let it cook for about twenty minutes, or until the liquid is absorbed.

IMG_0667

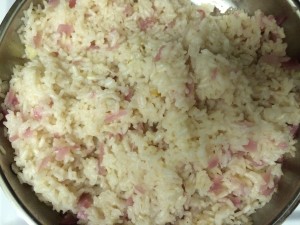
You’s have fluffy rice, studded with red onion and garlic, and the scent of limes will be wafting in the air.

This is a great side dish for tons of main courses, but when it’s warm out, all I can think about is some shrimp slathered in old bay.


IMG_0668

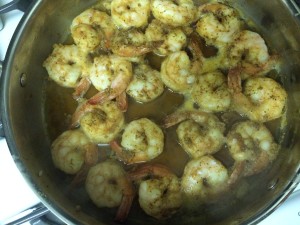
Simply toss frozen (straight from the freezer, no thawing), deveined shrimp (peeled or not, but always tail on) into a big skillet and douse it with old bay seasoning. Cook over medium until shrimp are done (they’ll turn pink).


IMG_0669

Serve the shrimp alongside the rice. The rice will cool down the heat from the seasoning.


IMG_0670

Then again, so will an ice cold beer.

Forbidden Fruit – Peaches

Bible scholars have it all wrong.

In the garden of Eden, it wasn’t an apple with which Eve tempted Adam.

No, it was not a bright red apple that grew from the Tree of Knowledge.

No, sirs. No. I say.

The forbidden fruit that caused the ejection of our ancestors from paradise was a juicy, summer ripe peach.

For what is more sinful than biting into a plump, golden peach and licking your fingers as the juices drip down your arm. Sensual. Seductive. It surely was the peach that drove Eve to sin.

Exhibit A: in China, the peach is the fruit of the gods and is a symbol of longevity (http://www.nationsonline.org/oneworld/Chinese_Customs/flowers_symbolism.htm)

When I opened the weekly circular for my local grocery store and saw that peaches were on sale this week, I felt that little thrill you get when you do something you know you shouldn’t.

Why do peaches conjure these feelings?

Perhaps it has to do with their tantalizing scent and sweetness.

Or maybe it’s just the association of peaches with steamy summer nights, languid beach days and standing in the fridge with a spoon eating peaches out of the bowl.

Going back to the weekly circular. Yes, I check out what’s on sale that week.

Firstly, because well, who doesn’t like saving money and who, with a city kitchen especially, doesn’t need to save money?

Secondly, things are usually on sale when they are in season. Fruits and vegetables are cheaper when the cost of transportation etc is cheaper, meaning when they are able to be obtained locally.

I try to support local growers when I can.

And I am more than happy to take those peaches off your hands Mr. Local Farmer Man.

Growing up, I spent my summers at the beach. My parents have a beach house in the small town of Fenwick Island, Delaware (12 streets. There are 12 streets in the town).

My dad’s family has always rented a cottage a few blocks over, and one or other of his siblings is there most of the summer with some or all or an assortment of cousins.

But the best week was always when my aunt Ann Marie was there. Because Ann Marie cut up peaches.

It’s such a simple thing really, ripe peaches cut up in a bowl.

Ann Marie would always buy pounds and pounds and bags of ripe, fresh peaches and she and my grandma would sit in the tiny kitchen of the cottage cutting up the endless piles of peaches. The smell would overwhelm the beach side cottage. It would overpower the salt air wafting off the ocean.

The peaches would be tossed in a bowl with some sugar and put into the fridge overnight. Overnight, the sugar worked its magic, drawing out the juices and making a natural syrup surrounding the peaches.

We’d clamor around the big bowl, spoons diving in, no time to scoop out into our own servings.

We were all family.

The first time I brought my boyfriend to the shore to meet the family, we walked into the cottage and my aunt said “I cut peaches!”

I was thrilled. He didn’t know what she meant.

He had never had cut peaches.

Well he had eaten peaches before, but not like this.

He couldn’t understand my excitement. Until he had his first bite.

Now he gets just as excited as I do about peach season.

Admittedly, it’s a little early. August is really when they’re best. But if Mother Nature is going to give us peaches in May, I am not going to say no.

This isn’t really a recipe. More of a suggestion. One you won’t be sorry to follow.

Buy a pound of peaches. You want nice firm fruit that waft peach scent into the air.

Wash and dry them.

Break out a cutting board and start slicing. You can cut in wedges. I go for chunks.

Drop the peaches into a bowl. Or a glass jar. I use a jar because I love opening the fridge and seeing a jar full of gold and pink peaches dripping in their own juices.

IMG_0584

Sprinkle the cut peaches with sugar. Or drizzle with honey. I actually prefer honey, but my aunt and grandma always used sugar. I just like the extra sticky syrupyness the honey provides.

IMG_0586

Resist the urge to eat these right away. Refrigerate overnight. You won’t be sorry.

I love having a jar of peaches in the fridge all summer.

You can eat them right out of the jar.

Or you can top some Greek yogurt with peaches and granola for a healthy snack or breakfast or a light lunch.

Warm toast, slathered with ricotta cheese, piled with cubed peaches and topped with an extra drizzle of honey is a sweet bruschetta for a 3 O’clock pick me up.

A bowl of peaches topped with a dollop of whipped cream is a virtuous dessert on a hot night.

So go, off to the store with you.

And ask as T.S. Eliot did,

Do I dare to eat a peach?

From The Love Song of J. Alfred Prufrock

“Shall I part my hair behind? Do I dare to eat a peach?
I shall wear white flannel trousers, and walk upon the beach.
I have heard the mermaids singing, each to each.”

Summer on a plate strawberry pie

So it’s still not particularly warm out.

But when I stand in my kitchen, the sunlight streaming through the window, it at least looks like summer today.

And if you make this pie, your kitchen will smell like summer.

Look. Smell. We’re two senses of the way there!

Seriously, this pie will make your kitchen smell like strawberry fields.

I know we made cookies yesterday. And yes, we still have cookies left. But it’s a holiday weekend. So let there be gluttony!

Though, this pie is loaded with fruit, so it’s really good for you.

Before I get into the strawberry, summery goodness of this pie, I need to talk to you about the crust.

I know.

There are so many pre-made crust options at the store.

And I know, who has time to make pie crust?

1. It’s a holiday weekend, so you have the time.

2. This crust is faster than you think.

3. You will make this and you will understand. There is no store bought crust that compares.

This is my Grandma Helen’s pie crust.

I first learned to make this when I was trying to recreate her famous banana cream pie.

That’s right. Famous.

You never heard of Grandma Helen’s banana cream pie?

Go to Delaware. Ask anyone from my dad’s neighborhood. Ask anyone from our family. Ask any kid who grew up with any one of my Grandma Helen’s 6 kids.

That’s right. 6 kids.

My dad is the oldest boy and the second oldest kid of 6.

My grandmother had 6 children. And no dishwasher.

God bless her.

Her banana cream pie is probably her most-loved recipe. With her cinnamon rolls the probable second. I’ve never tackled those though. I read the recipe once and realized that it’d make like 4 dozen. Makes sense, considering her family of 8 often brought friends over. But I don’t think my itty bitty city kitchen can handle 48 cinnamon rolls. So until I have the whole family coming over for brunch, or until I figure out how to cut down the recipe, I will leave those to my aunt.

The reason the pie is so good (besides the butter, egg and vanilla filled homemade pudding) is very simple.

The crust.

A good pie crust is hard to come by. You may think you had a slice of pie with a good crust at a diner, but most of the time it’s a little too underdone, or a little too dry or a little to bland.

This is good pie crust.

I actually have the recipe for it hanging on the wall.

mail-1

For the crust you will need

  • 1 stick butter, cold and cubes
  • 1.5 cups flour
  • .5 tsp. salt
  • 4-6 tablespoons ice cold water

The key to the crust is cold butter and cold water.

Now, a note on the water.

The women in my family, on all sides of my family, are bossy and stubborn.

My grandmother is no exception. The recipe reads, and I quote “4-6 tablespoons cold water (always use 4)”

mail

I laugh every time I read it.

4-6 but always use 4. Also known as, grandma knows best, or do it my way or else.

(My grandmother passed away 3 years ago. And every time I make this recipe I pray she isn’t looking. I have to use 6 tablespoons. It must be drier in the city than it is in Delaware.)

Preheat oven to 400.

Combine the flour, butter and salt. You can use a pastry cutter or your hands. Or you can use yia-yia’s ancient cuisinart. I went with this option so I could have a grandma from each side in the kitchen with me. There’s no way this pie could be bad with two grandmas helping. (There’s also no way anything that starts with a stick of butter could be bad.)

IMG_0538

Pulse or combine until butter forms pea-sized clumps.

IMG_0540

Add the cold water (start with 4 tablespoons, stir then add more if necessary) and combine until the dough forms a ball.

Turn out the dough onto a well-floured counter. Divide the dough in half and roll each half into a ball.

This recipe will give you two 9 inch pie crusts, so enough for 2 open-faced pies or one pie with a top. The beauty of this crust is its versatility, Pies and tarts of course. But since there’s no sugar, it easily goes savory for quiche.

IMG_0541

You can wrap one ball in plastic and refrigerate for 2 days or freeze up to 3 months.

Roll out one of the dough balls.

IMG_0542

Be patient with the dough. Don’t fight it. Just take your time and don’t be too concerned with making a perfect circle. Homemade pies never look perfect. They look rustic, and homemade and delicious.

Now. You may be thinking, patient? I thought you don’t have patience?

I don’t.

But my boyfriend does.

So he rolled out the dough and put it into the pie pan.

IMG_0543

Bake for 10-12 minutes. Grandma says 10-12. She doesn’t give an exact time on this one.

While the crust bakes, it’s time to get started on the filling. I promise I will share the banana cream pie secret filling recipe to you, but not right now. Right now, it’s all about the strawberries.

For the filling you will need:

  • 1 pint + 1 handful of strawberries washed and hulled
  • 1/3 cup water
  • 1/2 cup sugar
  • 2 tablespoons cornstarch

Slice the strawberries. The pint will go into the pie sliced. The handful will be used to make a strawberry jam-like sauce. Most recipes call for strawberry jello or a packet of gelatin, but I wanted a more natural alternative.

Set aside the sliced strawberries until the crust is cooled.

IMG_0544

Take the remaining handful of strawberries and toss in a blender or food processor and blend.

IMG_0547

Pour this vibrant strawberry sauce into a small pot along with the water, sugar and cornstarch.

Cook over a medium heat, stirring constantly until the sauce bubbles and thickens.

This is where your kitchen will smell like a strawberry field.

Remove from the heat and let cool slightly.

Toss the strawberry slices into the cooled crust.

IMG_0546

Then pour the sauce over, shaking the pan to get the sauce into all the nooks and crannies.

IMG_0548

Pop the pie in the fridge. You’re going to want to refrigerate this pie for a good 4-5 hours before serving. Trust me. This is one of those pies you want to be icy cold.

You can stop here. But who would want to?

This pie is begging for whipped cream.

Pour some powdered sugar and some heavy cream in a bowl.

Tip: stick the bowl and the whisk or beaters in the freezer for a couple minutes.

I know I just said pour some sugar and some cream in a bowl. I didn’t give you measurements.

Whipped cream is a matter of personal taste. We like it more on the cream side with just a hint of sweetness. You may want it really sweet. You might just have to pour and whip and taste and repeat to get the ratio you want.

Whip the mixture into stiff peaks.

IMG_0550

Spread the whipped cream over the pie. Make sure the pie is cooled down before you add the whipped cream, otherwise it will all just melt together.

Add a few sliced strawberries on top so everyone knows what’s inside.

IMG_0552

Slice.

Eat.

Enjoy.

Summer on a plate.
Mexican Chili

The best friend of the itty bitty city kitchen is the one pot meal.

Only pot to make room for on the limited counter space.

And more importantly, only one pot to wash.

This is especially important after a long day at work. It’s even more important on hockey night.

Two nights ago, the Rangers thwarted the Bruins plans for a sweep, winning game 4 in the series in overtime 4-3. The series stands at 3-1. Bruins win, they’re in. Rangers win, they force a game 6 and hold onto Stanley Cup hopes.

This is going to be an intense game. You’re not going to want to have to wash stacks of dishes.

It’s supposed to be summer. It’s supposed to be time for seafood and burgers and freshness.

But, like I said before, in New York it’s 53 degrees with 23 mph winds.

Dinner calls for something that will warm us up. And be easy to eat during the game.

But after a long, cold winter of soups and stews and potatoes and roasts, I needed something different.

I am so ready for summer, and summer makes me think of Mexican.

Peppers, black beans, avocados, spicy chorizo, a crisp refreshing Corona.

How to take those flavors and make an easy to eat meal (tacos are too messy for hockey-watching on the couch) that will chase away the chill in the air.

This is my Mexican chili

You will need:

  • 1 bell pepper (any color is fine. I used green because those looked the best at the store)
  • 1/2 a yellow onion
  • 2 portabella mushrooms
  • 2 cans black bean
  • 1 can red kidney beans
  • 1 can diced tomatos
  • 1 can corn
  • olive oil
  • chorizo (note if you want to make this vegetarian leave out chorizo and add in some taco seasoning instead)

Drizzle olive oil in the pan. I like to use my aluminum pot here.

Add the chopped onion and pepper and cook until soft.

IMG_0531

Chop the chorizo and add to the pepper and onion.

Let cook so the chorizo flavors the oil and the peppers and onion.

IMG_0532

Add the cleaned and chopped portabella.

When the mushrooms are cooked down, pour in the can of diced tomatoes.

Stir and let come to a bubble.

IMG_0533

Wash and drain the beans and drain the corn. When the tomato juices bubble, add the beans and the corn to the pot.

Stir. Cover. Let all the flavors come together.

IMG_0535

Serve in bowls and add toppings as you wish.

Some ideas are taco cheese, monterey jack cheese, salsa, my avocado yogurt sauce (see here ) or even some crushed tortilla chips.

IMG_0537

Lime. Corona.

Done.

Or, even better, try this little drink concoction.

Panache. (Also called a Shandy.)

This is a fantastic summer cocktail.

You just need any light beer and limonade.

Limonade is a French soda. It’s like a carbonated lemonade.

Going with the Mexican food thing, we used Corona.

Pour the beer into a frosty glass and add some limonade – roughly 2 parts beer to one part limonade. If you want it more citrusy, you can go one to one.

0

Chili. Chips. Panache.

Done.

Oh. And the game. Don’t forget to turn that on.

Let’s go Rangers!

Rainy Day Cookies

Memorial Day Weekend!

A three-day break from work.

The unofficial start of summer.

Time for barbecues and picnics and ripe peaches and watermelon and strawberry pie.

Except.

Here in New York, it’s 53 degrees and cloudy and windy.

So my plans for a hefty slice of cold strawberry pie after a burger and coleslaw had been thwarted. (I promise to tell you how to make the strawberry pie though once the temperatures rise).

All we can think about are movies on the couch and a big bowl of popcorn.

And cookies.

Gray and cold days scream for cookies.

Trouble was, I had planned on making pie. The strawberries were washed and sitting in the fridge, ready to be baked into a slice of summer. The butter was cubed for the pie crust.

So, we improvise.

Remember my pantry staples? Yup this is why you have them.

If you have cake mix, vegetable oil and eggs, you can make cookies.

Seriously.

All you need are

  • 1 box cake mix (I used dark chocolate)
  • 2 eggs
  • 1/2 cup vegetable oil

This gives you a basic cookie dough. Then you can mix in whatever you want.

For super decadent chocolate gooeyness, add chocolate chips to chocolate cake mix, or peanut butter chips for a play on Reese’s cups. Vanilla cake mix plays well with chocolate chips and macadamia nuts. Or coconut if you want a real taste of summer.

I think that one of the most perfect combinations, besides peanut butter and chocolate, is chocolate and hazelnuts. Nutella? One of the world’s most perfect foods.

To make the cookies, preheat oven to 350.

Combine the cake mix, eggs and vegetable oil. The mix will be really thick. It will almost resemble the Oreo crumble on dirt cups. If you never made dirt cups as a kid go talk to your mom right now about why she deprived you of such an iconic childhood treat.

IMG_0527

When the ingredients are combined, stir in the mix in of your choice. I used about a half cup of hazelnuts, I think. I don’t really measure. I just kind of throw them in and stir and add more if I need to. I just go for no cookie being left without nuts.

Spoon out the batter onto a greased cookie sheet. You can make the cookies any size you want. A little smaller than a ping pong ball gives you two dozen cookies.

Bake for 10-12 minutes.

IMG_0529

Your kitchen smells like chocolate. Melted, warm chocolate.

Brew a pot of coffee or some tea.

And settle into the couch for a 3 O’clock coffee break.

(My dad has coffee and a cookie at 3 everyday. He passed the habit to me. My body knows when it’s 3 O’clock)

These cookies are like a mix between a cookie and a brownie. Cakey and fudgey, but chewy and crunchy.

The gray skies don’t seem like such a damper on the weekend anymore.