Lemon Scones

It’s been rainy and dreary here in New York. So we definitely needed something yummy, and warm and comforting.

But it’s also almost Spring (or at least it should be feeling like Spring, ahem, Mother Nature).

So I was thinking of a recipe that would be good for a rainy day but would also hint at the coming of Spring.

My thoughts immediately turned to scones. What’s better on a rainy day than a warm, buttery scone and a mug of tea?

Nothing! That’s right.

But how to spring-ify that scone?

I don’t know about you, but spring always makes me crave bright, citrusy, lemony desserts.

Bingo.

Here you have super simple, super warming scones, topped with a bright lemon sugar.

For the scone recipe you will need:

  • 1.5 cups flour
  • 2-3 tablespoons sugar (depends on how sweet you want them)
  • 2.5 teaspoons baking powder
  • .5 teaspoon baking soda
  • pinch of salt
  • 5 tablespoons unsalted butter
  • 2/3 cup reduced fat buttermilk

Topping

  • zest of one lemon
  • 2-3 tablespoons sugar

Preheat oven to 400.

Mix together the dry ingredients and then add five tablespoons of cold butter.

Using a pastry cutter or two knives combine the butter with the dry ingredients.

Then make a well and add the buttermilk, stirring until the ingredients come together. You may have to get in with your hands and knead the dough a bit.

Let the dough sit for a minute while, in a bowl, you combine the lemon zest and some sugar to make your lemon sugar topping.

Break off roughly baseball sized balls of dough, loosely form in a ball and press the top into the lemon sugar.

Arrange on an ungreased baking sheet.

Bake for 15 minutes or so.

Buttery, warm, comforting scones with a bright lemon zing.

Come on Spring!

Snickerdoodles

IMG_1378

It’s that time of year.

Cookie swap time!

It’s snowy and cold so it’s the perfect time to hang out in the kitchen, warmed by the stove preheating, and fill the apartment with smells of butter and sugar and cinnamon.

It’s even better when you share those cookies with friends. And, you know, when they share some with you.

These are my cookies for this holiday season.

I made them and brought them into work, because who better to experiment on than your coworkers? My coworkers in London got excited when they heard Snickerdoodle. But then they felt cheated when they learned that there was, in fact, not a snicker to be found.

This of course led to us googling the origin of Snickerdoodle. (see here)

What you really need to know is that the cookies are butter, sugar, cinnamon goodness. Do I have your attention?

For this recipe you will need:

  • 2 3/4 cups flour
  • 2 tsp baking powder
  • 1/2 tsp salt
  • 2 sticks unsalted butter, room temperature
  • 1 1/2 cups sugar
  • 2 eggs
  • cinnamon
  • sugar

Preheat the oven to 350. In a large bowl, combine butter and sugar until fluffy.

I forgot to take a picture so moving to the next step.

Add the eggs, flour, baking powder and salt and mix until combined.

IMG_1370

Set yourself up with a little assembly line. Bowl with dough, small bowl with cinnamon and sugar mix, cookie sheet.

IMG_1372

Roll the dough into one inch balls, dunk each dough in the cinnamon and sugar and rolling it around until totally covered.

IMG_1373

Continue until all the dough is rolled.

IMG_1374

Bake for about 12-15 minutes. I got about 30 cookies out of this recipe.

IMG_1376

If you’re doing a cookie swap, a great way to transport the cookies is in these cute little mason jars. A stack of them on a plate is great too.


IMG_1377

Summer on a plate strawberry pie

So it’s still not particularly warm out.

But when I stand in my kitchen, the sunlight streaming through the window, it at least looks like summer today.

And if you make this pie, your kitchen will smell like summer.

Look. Smell. We’re two senses of the way there!

Seriously, this pie will make your kitchen smell like strawberry fields.

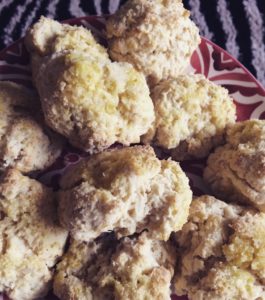
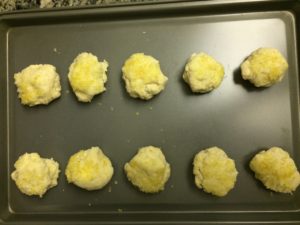
I know we made cookies yesterday. And yes, we still have cookies left. But it’s a holiday weekend. So let there be gluttony!

Though, this pie is loaded with fruit, so it’s really good for you.

Before I get into the strawberry, summery goodness of this pie, I need to talk to you about the crust.

I know.

There are so many pre-made crust options at the store.

And I know, who has time to make pie crust?

1. It’s a holiday weekend, so you have the time.

2. This crust is faster than you think.

3. You will make this and you will understand. There is no store bought crust that compares.

This is my Grandma Helen’s pie crust.

I first learned to make this when I was trying to recreate her famous banana cream pie.

That’s right. Famous.

You never heard of Grandma Helen’s banana cream pie?

Go to Delaware. Ask anyone from my dad’s neighborhood. Ask anyone from our family. Ask any kid who grew up with any one of my Grandma Helen’s 6 kids.

That’s right. 6 kids.

My dad is the oldest boy and the second oldest kid of 6.

My grandmother had 6 children. And no dishwasher.

God bless her.

Her banana cream pie is probably her most-loved recipe. With her cinnamon rolls the probable second. I’ve never tackled those though. I read the recipe once and realized that it’d make like 4 dozen. Makes sense, considering her family of 8 often brought friends over. But I don’t think my itty bitty city kitchen can handle 48 cinnamon rolls. So until I have the whole family coming over for brunch, or until I figure out how to cut down the recipe, I will leave those to my aunt.

The reason the pie is so good (besides the butter, egg and vanilla filled homemade pudding) is very simple.

The crust.

A good pie crust is hard to come by. You may think you had a slice of pie with a good crust at a diner, but most of the time it’s a little too underdone, or a little too dry or a little to bland.

This is good pie crust.

I actually have the recipe for it hanging on the wall.

mail-1

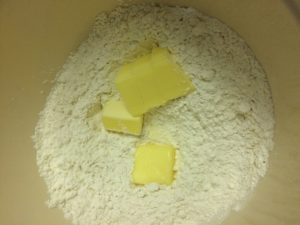
For the crust you will need

  • 1 stick butter, cold and cubes
  • 1.5 cups flour
  • .5 tsp. salt
  • 4-6 tablespoons ice cold water

The key to the crust is cold butter and cold water.

Now, a note on the water.

The women in my family, on all sides of my family, are bossy and stubborn.

My grandmother is no exception. The recipe reads, and I quote “4-6 tablespoons cold water (always use 4)”

mail

I laugh every time I read it.

4-6 but always use 4. Also known as, grandma knows best, or do it my way or else.

(My grandmother passed away 3 years ago. And every time I make this recipe I pray she isn’t looking. I have to use 6 tablespoons. It must be drier in the city than it is in Delaware.)

Preheat oven to 400.

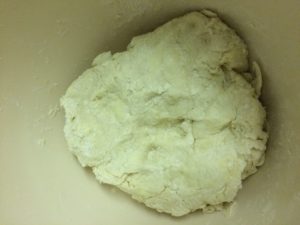
Combine the flour, butter and salt. You can use a pastry cutter or your hands. Or you can use yia-yia’s ancient cuisinart. I went with this option so I could have a grandma from each side in the kitchen with me. There’s no way this pie could be bad with two grandmas helping. (There’s also no way anything that starts with a stick of butter could be bad.)

IMG_0538

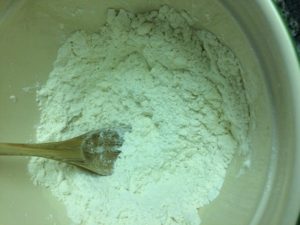
Pulse or combine until butter forms pea-sized clumps.

IMG_0540

Add the cold water (start with 4 tablespoons, stir then add more if necessary) and combine until the dough forms a ball.

Turn out the dough onto a well-floured counter. Divide the dough in half and roll each half into a ball.

This recipe will give you two 9 inch pie crusts, so enough for 2 open-faced pies or one pie with a top. The beauty of this crust is its versatility, Pies and tarts of course. But since there’s no sugar, it easily goes savory for quiche.

IMG_0541

You can wrap one ball in plastic and refrigerate for 2 days or freeze up to 3 months.

Roll out one of the dough balls.

IMG_0542

Be patient with the dough. Don’t fight it. Just take your time and don’t be too concerned with making a perfect circle. Homemade pies never look perfect. They look rustic, and homemade and delicious.

Now. You may be thinking, patient? I thought you don’t have patience?

I don’t.

But my boyfriend does.

So he rolled out the dough and put it into the pie pan.

IMG_0543

Bake for 10-12 minutes. Grandma says 10-12. She doesn’t give an exact time on this one.

While the crust bakes, it’s time to get started on the filling. I promise I will share the banana cream pie secret filling recipe to you, but not right now. Right now, it’s all about the strawberries.

For the filling you will need:

  • 1 pint + 1 handful of strawberries washed and hulled
  • 1/3 cup water
  • 1/2 cup sugar
  • 2 tablespoons cornstarch

Slice the strawberries. The pint will go into the pie sliced. The handful will be used to make a strawberry jam-like sauce. Most recipes call for strawberry jello or a packet of gelatin, but I wanted a more natural alternative.

Set aside the sliced strawberries until the crust is cooled.

IMG_0544

Take the remaining handful of strawberries and toss in a blender or food processor and blend.

IMG_0547

Pour this vibrant strawberry sauce into a small pot along with the water, sugar and cornstarch.

Cook over a medium heat, stirring constantly until the sauce bubbles and thickens.

This is where your kitchen will smell like a strawberry field.

Remove from the heat and let cool slightly.

Toss the strawberry slices into the cooled crust.

IMG_0546

Then pour the sauce over, shaking the pan to get the sauce into all the nooks and crannies.

IMG_0548

Pop the pie in the fridge. You’re going to want to refrigerate this pie for a good 4-5 hours before serving. Trust me. This is one of those pies you want to be icy cold.

You can stop here. But who would want to?

This pie is begging for whipped cream.

Pour some powdered sugar and some heavy cream in a bowl.

Tip: stick the bowl and the whisk or beaters in the freezer for a couple minutes.

I know I just said pour some sugar and some cream in a bowl. I didn’t give you measurements.

Whipped cream is a matter of personal taste. We like it more on the cream side with just a hint of sweetness. You may want it really sweet. You might just have to pour and whip and taste and repeat to get the ratio you want.

Whip the mixture into stiff peaks.

IMG_0550

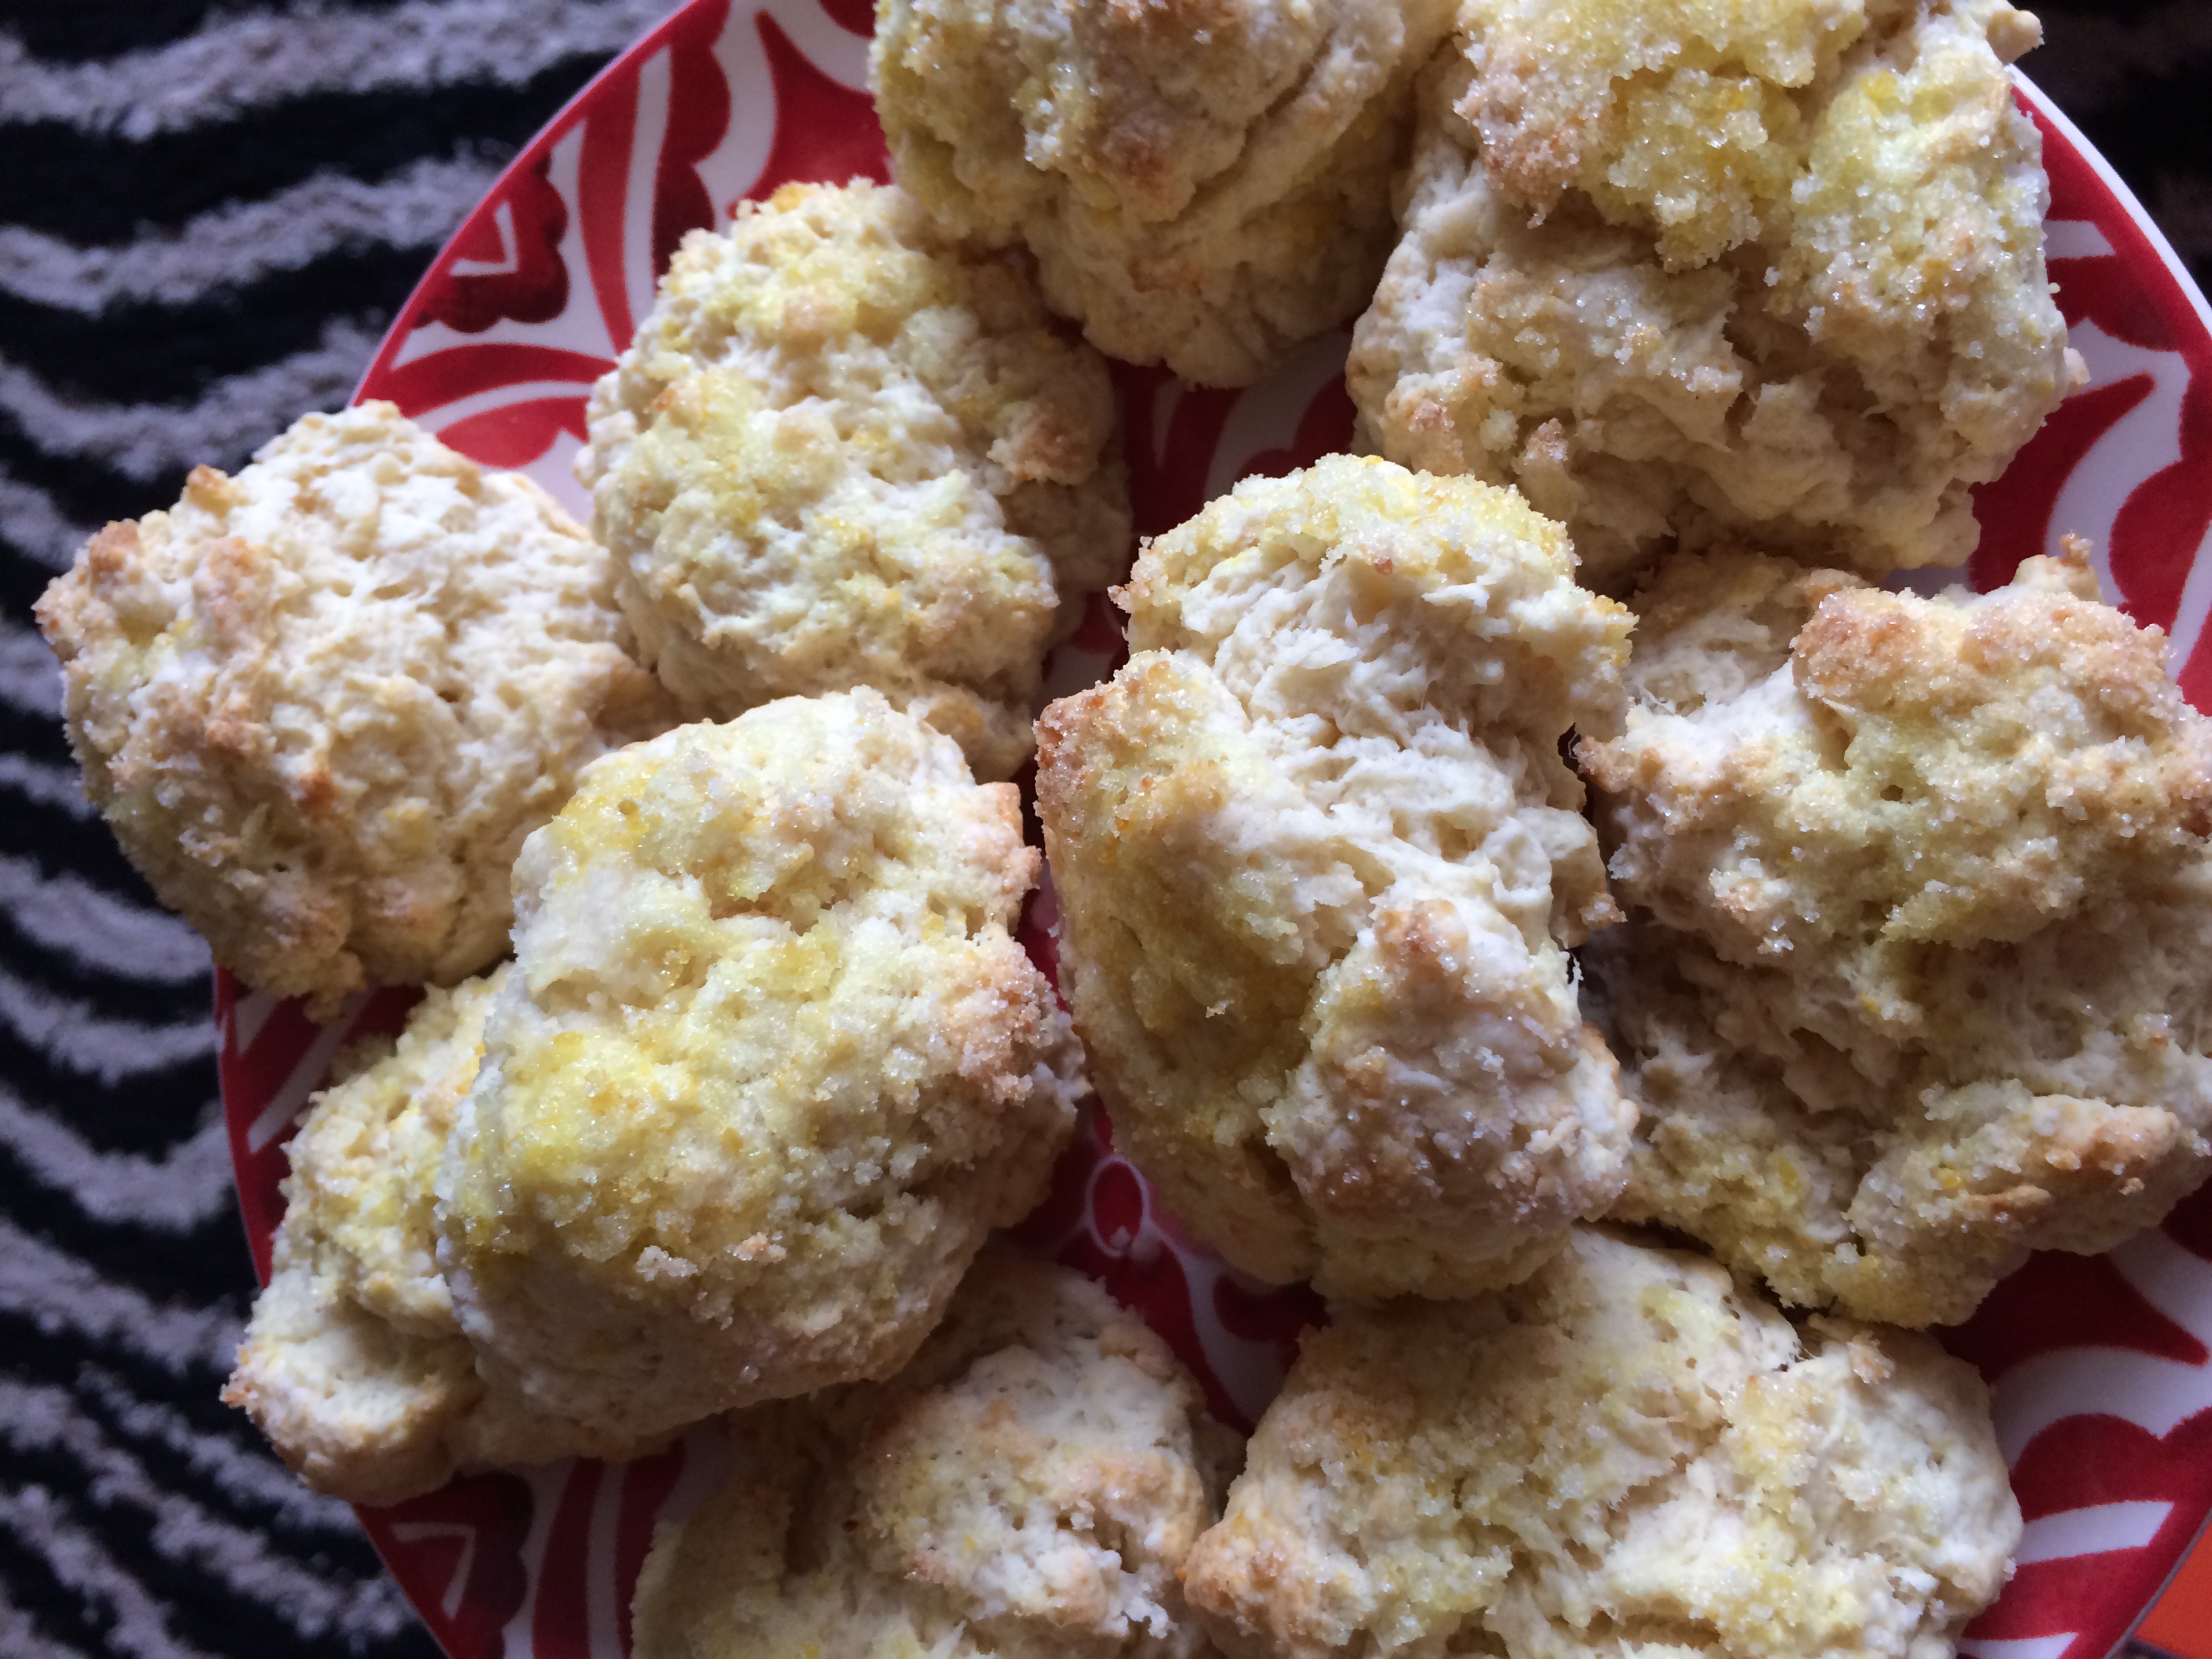
Spread the whipped cream over the pie. Make sure the pie is cooled down before you add the whipped cream, otherwise it will all just melt together.

Add a few sliced strawberries on top so everyone knows what’s inside.

IMG_0552

Slice.

Eat.

Enjoy.

Summer on a plate.

The Essentials: Part 1, Mission Dessert – pantry staples and shortbread

Yesterday’s emergency made me realize something. I had been so excited to start telling you about the wonderful and delicious food you can make in your tiny kitchen, that I forgot to go over some basics.

We covered kitchen equipment, but I completely left out pantry staples.

If I didn’t have a well-stocked cabinet and fridge, I would have had to make a stop at the store (which I didn’t have time to do) or, worse, a stop at the bakery. Now, we have a fantastic bakery near our apartment. But 1. I couldn’t bare the thought of ordering takeout pizza AND giving  my guests store bought baked goods, no matter how homemade they may taste and 2. while our bakery is probably one of the cheapest in Manhattan and the occasional cupcake or banana pudding for two doesn’t break the bank, the cost adds up when you’re getting into the dozen zone.

I break my pantry into two categories, dessert staples and quick dinner staples. I’m going to start with dessert staples for now and then cover dinner in another post. But some of these things, like butter, eggs, vegetable oil and heavy cream really live in both worlds.

So, here are the things I keep on hand so I can always whip up some sort of a dessert.

  • Box cake mix
  • Flour
  • Sugar
  • Baking Soda
  • Baking Powder
  • vanilla
  • Powdered Sugar
  • Eggs
  • Butter
  • Heavy cream
  • Chocolate (I prefer bar over chips because bars melt more easily due to stabilizers in chips and you can easily chop up the bar to use as chunks in cookies. I like to get one item that can do double duty instead of two when I can.)
  • vegetable oil

I know eggs, heavy cream and butter have shorter shelf lives than the other items. But, if you’re like us, you always have eggs on hand. I make egg sandwiches to take for lunch, he makes eggs on Sunday mornings and eggs find their way into dinner at least once during the week. Butter lasts in the fridge for a while. Or can be frozen.

I go for unsalted butter always. It’s better for baking and if I am going to use it in my cooking, I’d prefer to have complete control over the salt content. Only child. Control issues.

Heavy cream may seem like the only odd ball thing to have. But I end up using it more than you’d think. Adding creaminess to soup, a splash to a smoothie for some richness, and who doesn’t love some homemade whipped cream on ice cream or cake or a brownie?

It may seem like a lot to buy flour and baking soda and baking powder, but it will just be the initial stock up purchase that will hit your wallet hard. Baking soda and powder last me a good six month or more. Flour can go for a few months before needing a restock.

Chocolate never lasts. Ever.

It may seem like a pain to buy all of this stuff, but I promise you, it’s worth it.

With the above ingredients, you can whip up cupcakes or a cake with homemade butter cream frosting, cupcakes or a cake with a homemade and oh-so-fancy-shmancy-but-secretly-super-easy chocolate ganache, shortbread cookies, shortbread cookies dunked in chocolate ganache, chocolate chip shortbread cookies,  sugar cookies, glazed sugar cookies, chocolate dipped sugar cookies, a cake or cupcakes with a glaze… oh, and of course, yesterday’s emergency whoopie pies!

Yup. All that. From those 11 ingredients.

There’s more too, but that’s what comes to mind because those are the things in my arsenal.

The easiest one really, and the one I’ve found to be the biggest crowd-pleaser, is shortbread.

It is so deceptively simple.

It tastes like you’ve spent hours slaving away.

It also tastes like you will need to spend hours slaving away in the gym.

Only the latter is true.

Ready?

  • 2 sticks of butter
  • 4 oz sugar
  • 10 oz flour
  • (1 oz corn starch- the recipe calls for it, but I’ve left it out and they taste fine. I have it on hand for thickening soups or for making puddings, but don’t panic if you don’t and if you know you will never use it again)

Preheat oven to 300

Cream together the sugar and the butter.

When smooth, stir in the flour.

Press into a round or square greased baking tin. I use my square pan I use for brownies.

Prick holes in the top with a fork.

Bake for one hour.

Cut into squares upon removal from oven, when shortbread is still soft.

Place the bars on a plate to cool.

Your kitchen will smell like butter. And warm sugar.

Your defenses will be down.

You will be worried about whether your aunt will notice the dust on the TV, or if your boyfriend’s grandma will judge you for ordering mezze from the middle eastern restaurant down the street instead of spending the day in the kitchen making hummus and babaganoush and lamb kebabs (you had to work!) or if you can crack open the bottle of wine and pour yourself a glass without anyone noticing how much liquid has gone missing….

But then you will look at your shortbread squares arranged daintily on the plate.

And you will realize that no one will notice if one of those has gone missing.

Butter and sugar will dissolve in your mouth.

And all will be right with the world.

Last minute visitors – Emergency Whoopie Pies

Remember that amazing, bright, springy, wonderful pesto I made this morning?

Remember how much I was looking forward to dumping it over a bowl of angel hair pasta and curling up with it on the couch after a weekend of running around celebrating graduation?

Well that went out the window.

My phone rang.

My cell phone never rings during the day.

My boyfriend is always too insanely busy at work to call me during the day, so when I saw his name pop up on my phone I knew something was either wrong or that something had come up.

I was praying for the latter.

But I’ll admit I was a bit flummoxed when he said that a bunch of his family wanted to come over tonight.

What?

We were just with your family all weekend.

We were with them all weekend, and because we were with them ll weekend, we weren’t at our place this weekend.

Meaning, our apartment was a mess.

My mind went immediately to the still unpacked bags and the piles of laundry and the dust bunnies that needed vacuuming.

Then, my mind flew to the fridge.

Besides the pesto, there was nothing in there.

I hadn’t food shopped yet.

What would I feed these people?

I calmed down when he said everyone was cool with just ordering pizza.

But still, I couldn’t not make anything.

I’m a firm believer in offering anyone who comes to your house something homemade.

Which is why I try to keep a few key things in the apartment at all times:

  • box of cake mix
  • eggs
  • butter
  • powdered sugar
  • vanilla

With these on hand, you can at least make a semi-homemade dessert to go with your takeout dinner.

So here are my Emergency Whoopie Pies

You will need:

  • 1 box cake mix (any flavor)
  • 3 eggs
  • 3/4 cup water
  • 1/2 cup vegetable oil

Preheat oven to 350. Grease a cookie sheet.

Combine all ingredients in a bowl, mixing until blended. Some lumps are okay.

Drop rounded teaspoons of batter onto the cookie sheet.

They will spread a bit, so leave space. I can get 4 rows of 3, so a dozen on a sheet.

IMG_0482

I usually don’t care about things being the same size, but in this case, size does matter. You’re going to sandwich two of these together, so you want circles that are roughly the same size.

Bake for 8-12 minutes, until a toothpick comes out clean.

One batch of mine was done in 8, one was done in 11. Depends on how thick you made your cakes.

Remove from the oven and let cool completely.

I only have one cookie sheet, so I remove the cooked cake cookies and then dollop the next batch of batter on for round two.

While the second batch bakes and the first batch cools, it’s time to make the filling.

Super simple buttercream recipe.

  • 1 stick butter
  • 1 cup powdered sugar
  • 1 teaspoon vanilla

You can double this or triple this or half this to suit your needs.

This amount fills a dozen whoopies pies.

Mix together butter, sugar and vanilla until smooth. You can add more sugar if you want it a bit sweeter, or, if the frosting is too thick for your taste, you can stir in a little bit of heavy cream.

This is one of those feel recipes. You make it and you get a feel for the consistency.

You also, I’m sorry to say, might just have to taste it.

I know.

Horrible fate it is of the baker.

Tasting frosting.

Feel free to add more sugar or more vanilla as you like.

You can also add food colorings, or if you want to be more adventurous, different flavorings like mint or coconut.

I’m pressed for time, so vanilla it is.

IMG_0487

When the cookie cakes are completely cooled – you really have to let them cool all the way-

Patience is not a virtue I possess.

My mom gave me the middle name Grace, after my grandmother, so that’s the virtue I have.

I really think you only get one. So I am, unfortunately a very impatient person. Which is probably why I prefer cooking to baking, but I digress.

Let them cool completely. Otherwise you will have a runny, melty, sticky mess on your hands.

Flip a cookie cake over and frost the side that was face down on the cookie sheet. Find another one of roughly equal size, and, placing the cookie sheet side down, sandwich the frosting.

IMG_0486

It should ooze out the sides a little bit.

Continue making sandwiches until you run out of frosting and cookie cakes.

If you did it right, there will be a small spoonful of frosting in the bowl begging to be eaten.

If you did it really right, you will savor the frosting for a moment, admire your plate of whoopie pies and then buzz the family up to the apartment.

Throw the cookie sheet and the bowls into the sink.

Cover your sink (and the mess) with your over the sink cutting board.

None the wiser.

IMG_0488

The easiest scones ever. Period

I know.

You saw the word scone and you thought, yea okay, Martha Stewart. I’m really going to make scones.

Well, really.

Yes.

You are.

Well, I am.

And then you’ll see how easy they are and then you will, too.

You’re thinking, scones? Why on earth will I ever want or need to make those? I can grab one in the morning at Starbucks if I really want one, but when in my life will there be an occasion where me making scones will be necessary or appropriate.

First, making these is cheaper than buying a breakfast pastry on your way to work.

Second, making scones is kind of impressive. I just made these for mother’s day and both my boyfriend’s mom (future mother-in-law ladies, pay attention here) and grandmother  (who is the most amazing home cook) went nuts for these.

Third, when someone asks you what you’re up to and you say making scones, you just sound so domestic. You might not know how to do your laundry without shrinking your blouse or how to get rid of that weird ring around the bathroom sink, but you say you’re making scones and you are a domestic diva in the minds of all of your friends.

And fourth. One word. Brunch. Scones are always appropriate and necessary at brunch.

But what about all that kneading and rolling out the dough? I don’t have the space for that. You promised I could make all this in my tiny kitchen.

Guess what?

No rolling out dough.

Nope.

None.

This recipe is easy, almost foolproof. And you probably already have everything you need in your kitchen. And if you don’t, then once you buy these ingredients, you’ll have all the baking basics you will need to make many more wonderful sweets.

Preheat oven to 400.

Now I hate measuring and haven’t given you precise measurements until now. But baking is different than cooking. So here’s what you’ll need:

  • 1.5 cups flour
  • 2-3 tablespoons sugar (depends on how sweet you want them)
  • 2.5 teaspoons baking powder
  • .5 teaspoon baking soda
  • pinch of salt
  • 5 tablespoons unsalted butter
  • 2/3 cup reduced fat buttermilk

The buttermilk is the only non basic ingredient. It’s like 2 bucks though. And you can make pancakes with it. And who doesn’t like pancakes.

So those are the ingredients for the basic scone dough.

Mix all the dry ingredients in a bowl.

Now, here is the trick to this recipe. This is the only important step in making these.

IMG_0448

The butter needs to be cold. Really cold. Take it out of the fridge right before you are going to add it to the flour mixture. Cube it and toss it into the dry ingredients. The butter being cold will make the scones flaky and will give you these little buttery pockets to bite into.

If you’re fancy, you can pull out your pastry cutter to combine the butter and flour mixture. If you’re lazy, you can use your food processor to blend it all. If you’re like me, you know that your hands are the best tool. I just stick my hands in and start breaking the butter up into the flour. You want to end up with pea-size bits of dough.

Make a well in the center and pour in the buttermilk. Grab a spoon and mix until just combined.

The dough will be tacky and have a thick paste-like thickness.

This is your basic dough.

Now, you can go wild.

I added a handful of dried cranberries because I had them on hand. But raisins, dried apples, dried peaches, chopped hazelnuts, some chocolate chips or even just a sprinkling of cinnamon and sugar will work. If you want, you can bake em off plain and slather em with strawberry jam, piping hot out of the oven so the jam melts into the buttery bites.

Once you have your mix-in mixed into the dough, scoop relatively even-sized blobs of dough onto a cook sheet. I roughly form them into a football shape. These won’t spread much, so you can plop them down fairly close together. I usually get about 8 scones out of this recipe.

IMG_0451

I don’t go nuts about them looking perfect or being exactly the same size or shape. They will cook more evenly if they’re about the same size is all.

They take about 15 minutes. I check at the 13 minute mark and turn the pan if I need to.

Your kitchen is going to smell amazing.

These are not going to last long.

Brew a pot of coffee or some tea.

Pick out a witty British novel.

And enjoy.

IMG_0454