Ratatouille Over Couscous

I was thinking about the name of my blog, and I was thinking about what really makes a dish Itty Bitty City Kitchen friendly.

And I came up with a few factors.

As the name implies, the kitchen is itty bitty, so dinners need to not need a lot of ingredients. They also need to not require a lot of pans or any fancy gadgets that can’t be stored in said itty bitty kitchen.

Also, as the name implies, this kitchen is in a city, which means that it’s probably in a bustling, crowded area that’s packed with people and noise. It also probably means that work hours are long and by the time you get home, what with the crowds and noise, meal prep has to be fast. And easy. You’re probably tired.

So, with all of that in mind, here is what I think is one of the most itty bitty city kitchen friendly meals, ratatouille. You can vary the ingredients, but think five vegetables and some seasonings. Also, one pot. Also, also, you throw said ingredients into said one pot and just stir it once in a while. Small number of ingredients, one pot, and super fast and easy.

Oh. And Delicious.

Ratatouille is basically a stewed vegetable dish in a tomato base. You can swap out the vegetable and the spices based on your tastes, the season, and what you have on hand, but a can of diced tomatoes is essential.

I used:

  • 2 green bell peppers, diced
  • 1 small onion, diced
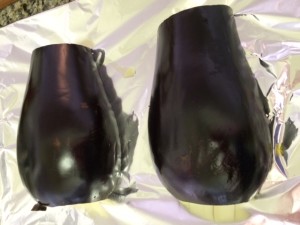
  • 1 medium eggplant, cut into one inch chunks
  • 1 can chickpeas, rinsed and drained
  • 1 can diced tomatoes

You will also need vegetable oil, salt and pepper. I went slightly Middle Eastern and added turmeric, but you could do herbs de provence, thyme, Italian seasoning, anything really.

This is a throw everything in one pot dish, but you don’t want to throw everything in at the same time. We’re going to layer a bit.

Drizzle some vegetable oil in a heavy-bottomed pot. Add the peppers and onions and cook over medium until soft (10-15 minutes).

Add the eggplant, a drizzle more oil, salt and pepper and cook for another 10-15 minutes.

Lastly, add the diced tomatoes, chickpeas and turmeric. Let this cook, covered, for another 10-15 minutes.

IMG_5067

This can simmer for longer, but if you’re just home from work and starving because someone did not order lunch for the meeting you had from 12-3, then this is good to go.

This makes a great side dish if you wanted to have some grilled chicken or steak.

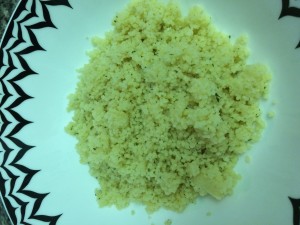
Or, if you want to make this the center of the meal, whip up some quick cooking couscous. This is sort of a small kitchen, busy cook staple. Bring water to a boil, pour in couscous, turn off burner, cover, and boom, five minutes later you have couscous.

So, to serve this over couscous, make the couscous and scoop a few spoonfuls into a bowl.

IMG_5064

Ladle over your ratatouille.

IMG_5065

And then to really bring the Middle Eastern flavor home, add a scoop of Greek yogurt.

IMG_5068

This dish is delicious, but the best part about it is that it gets even more delicious as it sits in the fridge.

What’s more itty bitty city kitchen friendly than a one pot dish that serves up two dinners?

Blueberry Fairy Muffins

We have many incredible neighbors down the shore. Maybe I’m biased, but I’d say we have the best street in Fenwick.

I mean, I’m almost certain we have the only street with a blueberry fairy.

You don’t know the blueberry fairy?

Well then, you, my friend, are missing out!

The blueberry fairy goes blueberry picking and then leaves bags of ripe, juicy blueberries on your door in the morning.

IMG_4656

They are the biggest and best blueberries ever, and they are just screaming to be baked into blueberry muffins.

Now, we used to have a blueberry muffin fairy on our street. She, sadly, has passed. So to keep the tradition alive, and to keep the fairy magic on our street, I sprinkled some flour and sugar pixie dust and whipped up these muffins. They’re not quite the same, but pretty darn close.

Thank you blueberry fairy (Colleen!) for the special ingredient.

For the muffins you will need:

  • 1 1/2 cups flour
  • 3/4 cup sugar
  • 1/2 tsp salt
  • 2 tsp baking powder
  • 1/3 cup vegetable oil
  • 1/3-1/2 cup milk (this estimated measurement will make sense later)
  • 1 egg
  • 1 cup blueberries

Preheat oven to 400 and line a muffin pan with cupcake papers.

In a large bowl mix flour, sugar, salt and baking powder.

IMG_4657

In a large measuring cup (2 cup size is best) measure out a 1/3 cup of vegetable oil.

IMG_4658

add the egg

IMG_4659

and then pour in enough milk to bring the liquid to one cup (about 1/3 to 1/2 cup of milk)

IMG_4661

Whisk the liquids together.

IMG_4662

Then add to the dry ingredients and stir until well combined.

IMG_4663

Add your blueberries and carefully fold them into the batter.

IMG_4664

Fill your cupcake liners about 3/4 of the way.

IMG_4665

And bake the muffins for about 20 minutes, until golden and a toothpick comes out clean

IMG_4666

You can let them cool. Or you can break one open and dig in.


IMG_4667

Baba Ganoush


I love Greek and Middle Eastern food and I love eggplant.

So baba ganoush is right there in my wheel house.

I order it every time we are out at a Greek or Turkish restaurant, but for some reason I never thought to try making it. It’s funny, meme (husband’s grandmother) always made hummus and yogurt dips, but she never made baba ganoush. I guess because she, master chef, never made it, I assumed it was hard.

It’s essentially a fire-roasted or grilled eggplant puree mixed with tahini.

Well, I hosted Greek Easter this year for the first time, and, ya know, since I didn’t have enough to do what with all the other food, I turned to my husband and said I’m making baba ganoush.

Have I got news for you all: it’s so easy!

No, seriously.

You don’t need a grill or even a stove with gas burners.

All you need:

  • 1 eggplant
  • 2 tablespoons tahini (or more or less to taste)
  • salt
  • white pepper
  • food processor

Preheat your oven to 450.

Slice the eggplant in half lengthwise and then score the flesh with your knife in a cross hatch pattern, not going all the way through to the skin. Drizzle with a little olive oil.

IMG_4478

Place cut side down on a foil-lined cookie sheet and place in the oven.

IMG_4479

Bake for about 45 minutes, or until the eggplant has basically collapsed.

IMG_4482

Let cool then flip it over and scrape out the awesomely roasted eggplant with a fork.

IMG_4483

Place the scooped out eggplant into the food processor

IMG_4486

And add the tahini, salt and pepper. Blend until smooth.


IMG_4487

Serve immediately or put it in the fridge to chill. Amazing with veggies or with pita.

IMG_4488

Cannoli Dip


This is the best dessert I have ever made.

Seriously.

It’s incredibly delicious.

It’s no bake.

It’s 4 ingredients.

And it takes like ten minutes to make.

That right there is the recipe for the best dessert ever.

You will need

  • 16 oz container of ricotta
  • 1 cup powdered sugar
  • 2 tablespoons milk
  • mini chocolate chips

You will also need something to dunk into the dip. Strawberries were delicious. Italian cookies, biscotti, or even broken up ice cream cones would be great.

Into a large bowl, dump powdered sugar and ricotta.

IMG_4602

Carefully stir so you don’t get powdered sugar everywhere.

If the mixture is too thick, add a little bit of milk just to loosen things up. Then switch to a whisk and whip the mixture to incorporate some air.

IMG_4603

add your chocolate chips

IMG_4604

and stir

IMG_4605

place in a nice serving bowl and top with a few more chocolate chips

IMG_4607

You can serve immediately or refrigerate for a bit.

Serve with strawberries or cookies.


IMG_4613

So addictive.

IMG_4611

Enchiladas

Every time my husband goes to Austin he comes home raving about the enchiladas.

We make quite a bit of Mexican food, but I had never tried enchiladas.

This was a decidedly team effort.

  1. because he is the one who has eaten these fabled enchiladas from Austin
  2. and two, because as you read on, you’ll see you need four hands for this one.

I decided to keep the filling fairly similar something we would make for tacos. So I went with

  • 3 diced green bell peppers
  • 1 diced onion
  • 1 can black beans, rinsed and drained
  • shredded rotisserie chicken

Preheat the oven to 400

Start by tossing the peppers, onions and beans into a pot with a drizzle of vegetable oil. Cook over medium until the peppers and onions have softened.

IMG_4460

Toss in the shredded chicken. It’s already cooked so we’re just looking to warm it up a bit. Season with salt and pepper.

IMG_4461

You can stop there and have some awesome tacos. Just scoop the filling into tortillas and add some cheese and guac.

To turn them into enchiladas you will need:

  • 2 cans red enchilada sauce
  • shredded taco cheese
  • tortillas

You will also need a wide, shallow dish (like a pie pan) to dump the enchilada sauce in and a 9×13 baking dish to bake the enchiladas in.

Oh, and a partner. You definitely will want a partner for this one.

Pour some sauce into the 9×13 pan. Just enough to coat the bottom. Pour the rest into the shallow dish.

IMG_4468

Set up an assembly station with the pot of filling, cheese, tortillas, dish with the sauce and 9×13 baking dish. (ignore the bananas in the picture. We have a small kitchen. I had nowhere else for them to go)

IMG_4469

Fully dunk a tortilla in the sauce.

IMG_4470

Hold the tortilla and have your partner spoon some of the filling into the center. Careful you don’t overfill- you need to be able to roll these.

IMG_4471

Have your partner sprinkle on some cheese.

IMG_4472

Carefully roll the tortilla, bringing both sides together

IMG_4473

And place seam side down in the baking dish.

IMG_4474

Repeat this process until you are out of tortillas or until the baking dish is full.

IMG_4475

Pour the remaining sauce from the dish over the tortillas

IMG_4476

Top with cheese and bake for about 30-40 minutes

IMG_4491

Serve up with a side of guac.

IMG_4492

By the way, we made a lot of enchiladas because my brother in law was coming for dinner. But I definitely recommend making a big dish of these because 1. it’s a messy process, so get messy for a big reward, and 2. they keep well in the fridge, so you can have leftovers!

Warm Brie Salad

Remember last week when we were super French and made Croque Monsieurs and Ham and Cheese Quiche?

Also remember how we tried keeping the number of ingredients we had to buy to a minimum?

Well after a weekend in Atlantic City, we need some meals that don’t require a lot of ingredients (the slot machines are not always kind) and that are on the lighter side (there may have been a lot of drinks and 3am Taylor Ham sandwiches).

With the French theme from last week in mind, I kept turning to brie.

Now brie is not exactly light and healthy, but it packs a ton of flavor in a tiny amount. So used sparingly, and paired with fresh greens, we may be on to something here.

I’m a big fan of salads for dinner. And I’m an even bigger fan of cheese, so I thought about combining the deliciousness of brie with a salad. Then I thought, what’s better than brie? Exactly. Warm brie.

So for this dinner you will need:

  • greens, (I used a mix of baby spinach and spring mix)
  • some brie
  • some honey
  • I had walnuts on hand from the Mushroom Walnut Ravioli the other week, so I tossed those in as well.
  • Also added a handful of dried cranberries because I always have them in the fridge.

Begin by preheating your oven to 350 degrees.

Place your brie in an oven safe dish and drizzle with a bit of honey.


IMG_4429

Bake for about 10 minutes, but don’t walk too far away from the oven. The brie goes from still coldish to melted like that.

You just want it to be a little soft and runny.

Carefully top your greens with the warm brie and walnuts. Add dried cranberries or whatever else you wish.

IMG_4431

One Ham, Two Dinners, Part 2: Ham and Cheese Quiche

Tuesdays are worse than Mondays.

I don’t know why. They just are. Mondays at least you can talk to your coworkers about what you did over the weekend, and somehow in retelling the weekend fun, you can kind of extend it beyond the two days. But Tuesday? Tuesday is like okay for real now, you have to work. No excuses.

So I’m even more excited about the ham we made Sunday being in the fridge and ready to be transformed into a super easy super yummy dinner than I was yesterday.

Yesterday was all about the Croque Monsieur. Today, we’re going to take the same ingredients (minus the bread) and make a ham and cheese crustless quiche!

So easy. If you made the Croque Monsieur yesterday, you’ll have all the ingredients on hand. If not, the shopping list is still super simple.

  • ham, cut into one inch cubes
  • cheese, shredded (any kind works- mozzarella, swiss, cheddar- whatever you have)
  • five eggs
  • splash of milk
  • butter, for greasing the pan (you can use cooking spray too)

Preheat the oven to 400 degrees and butter a pie pan.

To the buttered pie pan, add your chunks of ham in an even layer.

IMG_4441

Then sprinkle over your shredded cheese.

IMG_4442

In a bowl, crack five eggs

IMG_4444

Add a splash of milk

IMG_4445

And whisk until combined.

Pour your milk and egg mixture over your ham and cheese.

IMG_4446

Bake for about 30-45 minutes, until the center is firm.

IMG_4447

Slice and enjoy.

IMG_4450

To continue the French theme, serve with a salad of greens topped with a mustardy vinaigrette. It will cut through the richness of the eggs, ham and cheese, like it did yesterday with the Croque Monsieur.

And there you have two meals from a few simple ingredients- eggs, milk, ham, cheese, butter and bread.

That’s two itty bitty city kitchen friendly meals from 6 ingredients!

One Ham, Two Dinners Part 1: Croque Monsieur

So my favorite thing in the world is when I can cook one thing and get more than one meal out of it.

Okay it’s not my favorite thing in the world, but it makes me really really happy.

I had a ham in my freezer from an Omaha Steaks order from my aunt. I had kind of forgotten about it. Then I saw it tucked in the back and the wheels immediately started turning.

If I cooked that one ham on Sunday, we could have Croque Monsieurs on Monday and a Ham and Cheese Quiche on a Tuesday. Even better? All of the ingredients for both meals are essentially the same, so less to buy at the store. Score!

Croque Monsieur is basically the best ham and cheese sandwich you will ever eat. When we were in Paris, my meals largely consisted of Croissants, Croque Monsieurs and Steak Frites. Croque Monsieur is sort of like a ham and cheese, meets grilled cheese meets savory stuffed French toast.

The ingredients are super simple, like a lot of French cuisine. It’s really just about the execution.

You will need:

  • bread (any kind you prefer)
  • ham, sliced
  • swiss cheese, sliced
  • butter
  • eggs
  • milk

I cooked the ham on Sunday, let it cool, sliced it and popped it in the fridge. This way, Monday after work I only had to assemble the sandwiches and cook them until the cheese melted. But I am getting ahead of myself.

IMG_4414

Start by placing a few slices of ham on one slice of bread.

IMG_4416

Add the cheese and then add the other slice of bread.

IMG_4417

In a shallow dish, add two eggs and a splash of milk

IMG_4418

and whisk until combined (see, kind of like French toast.)

IMG_4419

Next, carefully take the whole sandwich and place it in the egg and milk batter.

IMG_4421

Press it down so it is fully coated and then flip so the other side is coated as well.

IMG_4422

Repeat with your other sandwich.

Melt some butter on a skillet and place your sandwiches in the melted butter.

IMG_4424

Cook on the first side until golden brown (maybe 5 minutes over medium heat) and then flip and cook on the other side.

IMG_4425

The bread will be all golden and custardy and the cheese will be melting into the ham.

IMG_4426

For a very French touch, and to cut the richness of the ham and the cheese, serve with a salad with a mustardy vinaigrette. The mustard and the vinegar is the perfect balance to the richness of the sandwich.

IMG_4428

Enjoy your sandwich, and store the leftover ham and cheese in the fridge for tomorrow’s dinner. We’ll keep it French again with a ham and cheese quiche.

Mushroom Walnut Ravioli

One of the things that’s really tough when it comes to city living is grocery shopping.

Whatever you buy you have to be able to carry home, because unlike the suburban dwellers, us city folk don’t have a car trunk to transport the cans of chick peas, boxes of pasta and gallons of milk.

This means a bit of strategizing goes into my grocery shopping ventures. I try not to buy milk and orange juice at the same time, or do a restock on canned goods when i need to buy eggs (can be utterly disastrous).

The other grocery conundrum is while there may be a fabulous deal on cereal or pancake mix, and while it is true that these things have a long shelf life and can be bought in large quantities, my itty bitty city kitchen cannot hold large quantities of anything.

So, what’s a city chef to do?

Well, I’ll tell you.

Start thinking about how you can buy just a few things and transform them into one or maybe even two fantastically flavorful meals. That’s exactly what this dinner is. Three ingredients (plus butter and olive oil, which I always have) that go a long way when it comes to flavor, won’t take up a lot of room and aren’t too heavy to carry home.

  • Ravioli
  • Mushrooms
  • Walnuts

Bring a pot of water to boil and cook your ravioli according to package instructions.

In a skillet, drop in sliced mushrooms, some butter and some olive oil (I never measure butter and oil, so use your best judgment)

IMG_4434

Cook until the mushrooms are browned.

IMG_4435

And then add in your chopped walnuts.

IMG_4436

Cook until the walnuts are warmed, stirring so they don’t brown.

IMG_4437

Drain your ravioli and top with the mushroom walnut mix. For extra decadence, you can add a sprinkling of parmesan cheese.

IMG_4439

Decadent, indulgent, and super easy.

Easy Lemon Yogurt Cake

As soon as there is the tiniest hint of Spring in the air, all I want is lemon.

Lemon with shrimp, lemon with pasta, and especially lemon desserts.

I guess after a winter of heavy and rich soups and stews, my taste buds are craving something as bright and zingy as the beautiful sunshine streaming through the windows.

This is a fantastically light and fluffy cake. And the best part? I almost always have all of the ingredients on hand.

For this recipe you will need:

  • 1 ½ Cups  Flour
  • ½ Cup Greek yogurt
  • ½ Cup Canola Oil
  • 1 Cup Sugar
  • 2  Eggs
  • 2 Tsp Baking Powder
  • ½ Tsp Salt
  • Lemon zest (as much or as little as you want)
  • ¼ Cup Lemon juice (about 2 lemons)

Preheat the oven to 350 and grease an 8 inch round cake pan.

In a large bowl, which yogurt, sugar and eggs.

IMG_4221

until you have a well combined batter

IMG_4222

Add lemon juice, oil and lemon zest

It’s going to look like it wants to separate

IMG_4223

but keep whisking until well combined

IMG_4224

Add flour, salt and baking powder to the wet ingredients

IMG_4225

And whisk (carefully so you don’t have flour all over your kitchen) until you have a smooth batter.

IMG_4226

Pour into your greased cake pan.


IMG_4227

And bake for about 30 minutes. Until a toothpick comes out clean.


IMG_4228

After the cake cools, remove from cake pan and dust with powdered sugar. If you want to get fancy, you can cut a shape out of parchment paper and use it as a template for the powdered sugar.

Aww

IMG_4233

Slice and serve with some whipped cream.

IMG_4234

Lemony, light and oh so delicious.

And kind of healthy!

No butter and not a lot of sugar. Plus Greek yogurt. Which is so good for you.

Win!